/***********************************************************************************************************************
* DISCLAIMER
* This software is supplied by Renesas Electronics Corporation and is only intended for use with Renesas products.
* No other uses are authorized. This software is owned by Renesas Electronics Corporation and is protected under all
* applicable laws, including copyright laws.
* THIS SOFTWARE IS PROVIDED "AS IS" AND RENESAS MAKES NO WARRANTIES REGARDING THIS SOFTWARE, WHETHER EXPRESS, IMPLIED
* OR STATUTORY, INCLUDING BUT NOT LIMITED TO WARRANTIES OF MERCHANTABILITY, FITNESS FOR A PARTICULAR PURPOSE AND
* NON-INFRINGEMENT. ALL SUCH WARRANTIES ARE EXPRESSLY DISCLAIMED.TO THE MAXIMUM EXTENT PERMITTED NOT PROHIBITED BY
* LAW, NEITHER RENESAS ELECTRONICS CORPORATION NOR ANY OF ITS AFFILIATED COMPANIES SHALL BE LIABLE FOR ANY DIRECT,
* INDIRECT, SPECIAL, INCIDENTAL OR CONSEQUENTIAL DAMAGES FOR ANY REASON RELATED TO THIS SOFTWARE, EVEN IF RENESAS OR
* ITS AFFILIATES HAVE BEEN ADVISED OF THE POSSIBILITY OF SUCH DAMAGES.
* Renesas reserves the right, without notice, to make changes to this software and to discontinue the availability
* of this software. By using this software, you agree to the additional terms and conditions found by accessing the
* following link:
* http://www.renesas.com/disclaimer
*
* Copyright (C) 2012, 2021 Renesas Electronics Corporation. All rights reserved.
***********************************************************************************************************************/
/***********************************************************************************************************************
* File Name : r_cg_main.c
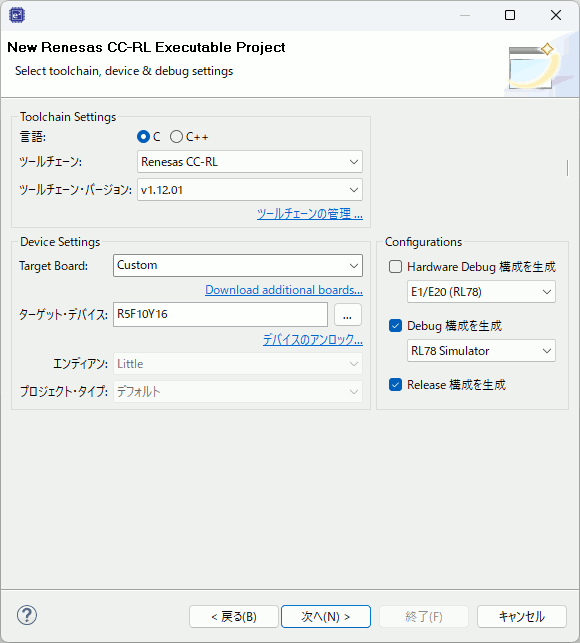
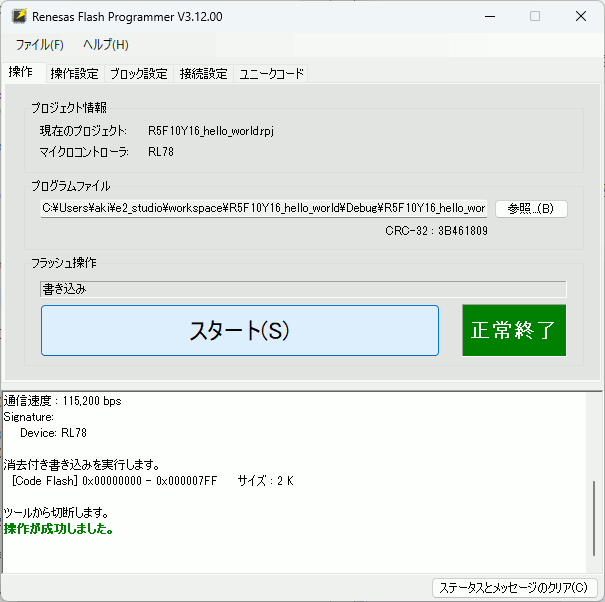
* Version : Code Generator for RL78/G10 V1.05.05.02 [08 Nov 2021]
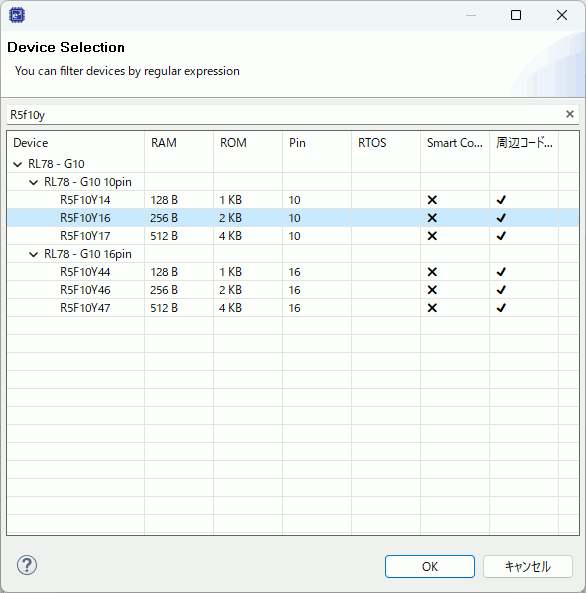
* Device(s) : R5F10Y16
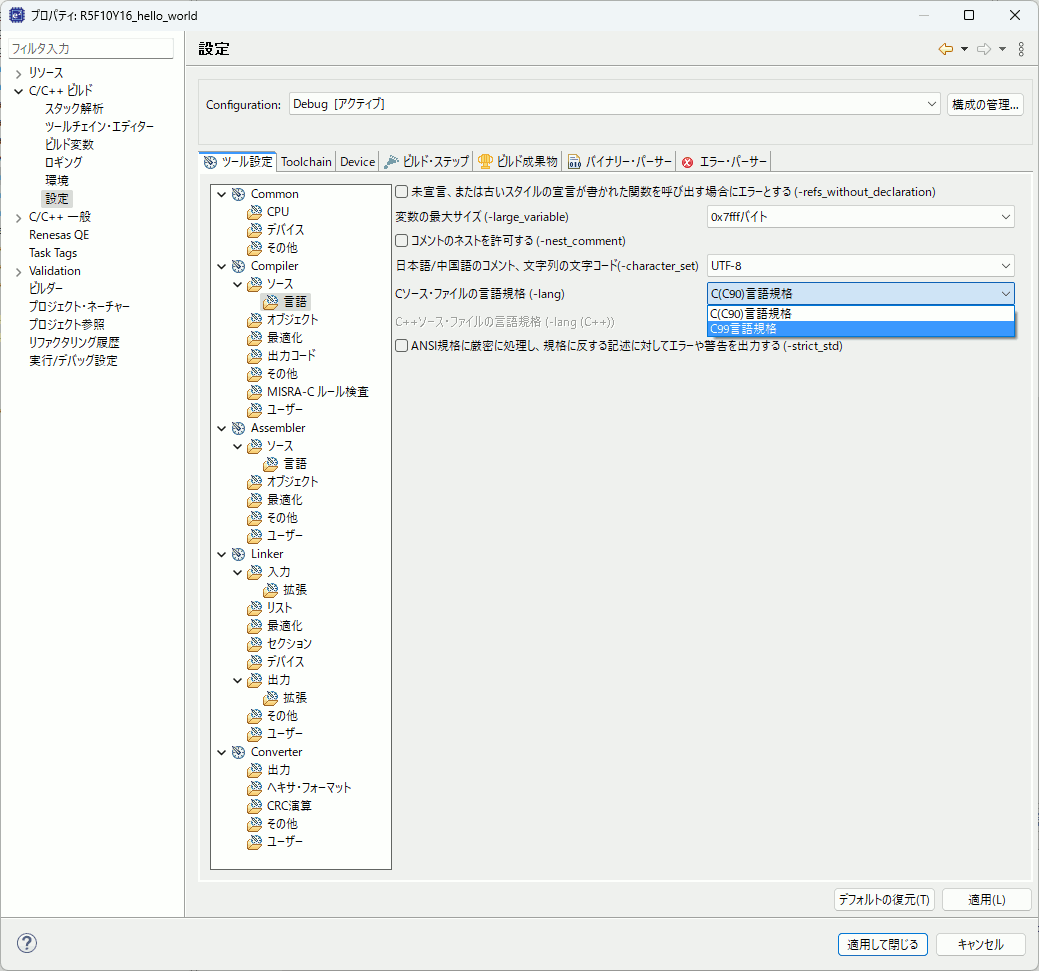
* Tool-Chain : CCRL
* Description : This file implements main function.
* Creation Date: 2023/10/29
***********************************************************************************************************************/
/***********************************************************************************************************************
Includes
***********************************************************************************************************************/
#include "r_cg_macrodriver.h"
#include "r_cg_cgc.h"
#include "r_cg_tau.h"
#include "r_cg_wdt.h"
#include "r_cg_sau.h"
/* Start user code for include. Do not edit comment generated here */
#include <stdint.h>
#include <stdbool.h>
/* End user code. Do not edit comment generated here */
#include "r_cg_userdefine.h"
/***********************************************************************************************************************
Pragma directive
***********************************************************************************************************************/
/* Start user code for pragma. Do not edit comment generated here */
/* End user code. Do not edit comment generated here */
/***********************************************************************************************************************
Global variables and functions
***********************************************************************************************************************/
/* Start user code for global. Do not edit comment generated here */
// I2C LCD (AE-AQM1602A) のターゲット(スレーブ)アドレス
#define AQM1602A_I2C_TARGET_ADDRESS (0x3e)
// I2C LCD (AE-AQM1602A) 用送信バッファ
#define I2C_SEND_BUFFER_SIZE (2U)
static uint8_t gI2C_SEND_BUFFER[I2C_SEND_BUFFER_SIZE];
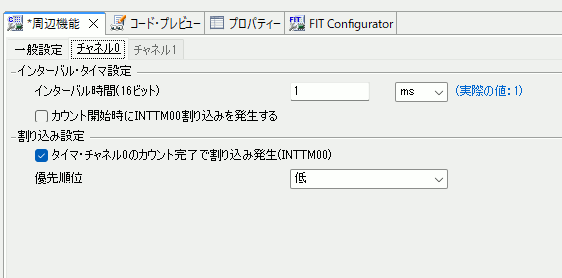
// 1ミリ秒 × multiply 遅延
void delay_milliseconds(uint16_t multiply) {
while (multiply-- > 0U) {
gMILLISECONDS_TIMER_EVENT_OCCURRED_FLAG = false;
while (!gMILLISECONDS_TIMER_EVENT_OCCURRED_FLAG) {
HALT();
}
R_WDT_Restart();
}
}
// ミリ秒delay
static inline void delay(uint16_t milliseconds) {
delay_milliseconds(milliseconds);
}
// I2C LCD (AE-AQM1602A)にコマンドを送信する
void AQM1602A_send_command(const uint8_t command_byte) {
gI2C_SEND_BUFFER[0] = 0x00;
gI2C_SEND_BUFFER[1] = command_byte;
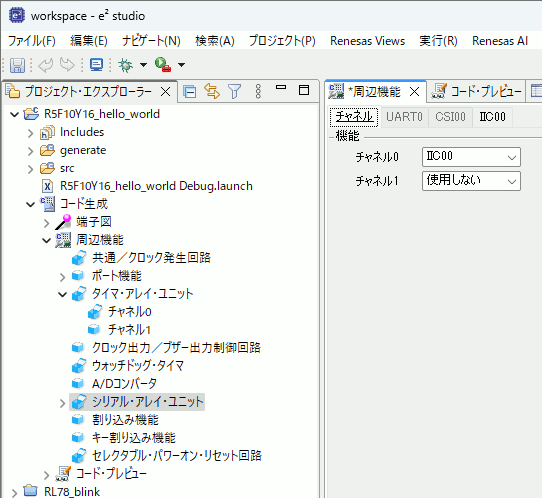
R_IIC00_Master_Send( AQM1602A_I2C_TARGET_ADDRESS << 1, gI2C_SEND_BUFFER, I2C_SEND_BUFFER_SIZE);
delay(10);
R_IIC00_StopCondition();
}
// I2C LCD (AE-AQM1602A)に1文字送信する
void AQM1602A_send_data(const uint8_t byte) {
gI2C_SEND_BUFFER[0] = 0x40;
gI2C_SEND_BUFFER[1] = byte;
R_IIC00_Master_Send( AQM1602A_I2C_TARGET_ADDRESS << 1, gI2C_SEND_BUFFER, I2C_SEND_BUFFER_SIZE);
delay(1);
R_IIC00_StopCondition();
}
// I2C LCD (AE-AQM1602A)に文字列を送信する
void AQM1602A_puts(const char *p) {
while (*p) {
AQM1602A_send_data(*p++);
}
}
// I2C LCD (AE-AQM1602A) クリアディスプレイ
void AQM1602A_clear_display(void) {
AQM1602A_send_command(0x01); // clear display
delay(10);
}
// I2C LCD (AE-AQM1602A) ホーム(左上)に移動する
void AQM1602A_return_home(void) {
AQM1602A_send_command(0x02); // return home
delay(10);
}
// I2C LCD (AE-AQM1602A)の初期化
void AQM1602A_init(void) {
AQM1602A_send_command(0x38); // function set
delay(20);
AQM1602A_send_command(0x39); // function set
delay(20);
AQM1602A_send_command(0x14); // internal osc frequency
delay(20);
AQM1602A_send_command(0x7A); // contrast lower
delay(20);
AQM1602A_send_command(0x54); // contrast higher / icon / power
delay(20);
AQM1602A_send_command(0x6C); // follower control
delay(20);
//
AQM1602A_send_command(0x38); // function set
delay(20);
AQM1602A_send_command(0x01); // clear display
delay(20);
AQM1602A_send_command(0x0C); // display on
delay(20);
}
/* End user code. Do not edit comment generated here */
static void R_MAIN_UserInit(void);
/***********************************************************************************************************************
* Function Name: main
* Description : This function implements main function.
* Arguments : None
* Return Value : None
***********************************************************************************************************************/
void main(void)
{
R_MAIN_UserInit();
/* Start user code. Do not edit comment generated here */
// 100ms待つ
delay(100);
//
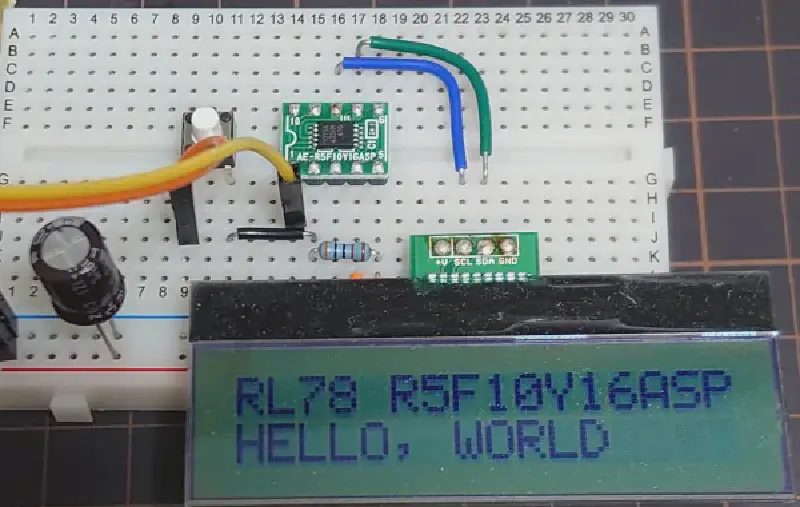
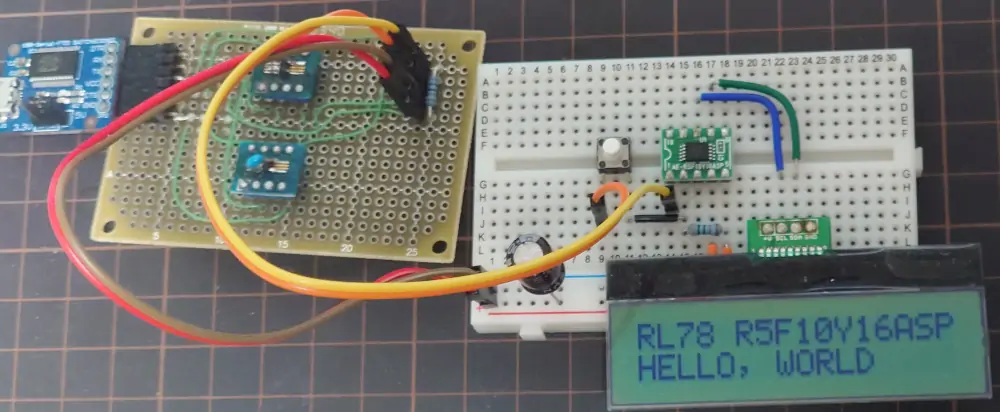
const char messages[2][17] = { "RL78 R5F10Y16ASP", "HELLO, WORLD ", };
// LCDの初期化
AQM1602A_init();
// 1行目
AQM1602A_puts(messages[0]);
// 2行目
AQM1602A_send_command(0x80 | 0x40); // アドレス設定
AQM1602A_puts(messages[1]);
//
while (1U) {
delay(3000);
AQM1602A_clear_display();
for (uint8_t i = 0; i < 16; ++i) {
AQM1602A_send_data(messages[0][i]);
delay(100);
}
AQM1602A_send_command(0x80 | 0x40); // アドレス設定
for (uint8_t i = 0; i < 16; ++i) {
AQM1602A_send_data(messages[1][i]);
delay(100);
}
}
/* End user code. Do not edit comment generated here */
}
/***********************************************************************************************************************
* Function Name: R_MAIN_UserInit
* Description : This function adds user code before implementing main function.
* Arguments : None
* Return Value : None
***********************************************************************************************************************/
static void R_MAIN_UserInit(void)
{
/* Start user code. Do not edit comment generated here */
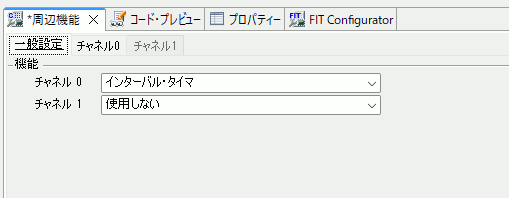
R_TAU0_Channel0_Start();
EI();
/* End user code. Do not edit comment generated here */
}
/* Start user code for adding. Do not edit comment generated here */
/* End user code. Do not edit comment generated here */